替代 docker 与 docker-desktop:国内环境下 podman 的安装与使用
- 电脑基础
- 2025-02-12
- 6642热度
- 2评论
在公司里使用 Windows 和 macOS 时,安装 docker-desktop 可能会面临商用侵权的问题。而 podman 和 podman-desktop 是开源免费的,可以较好的用于 docker 替代。
podman 是一个兼容 docker 的容器运行时,podman-desktop 是一个类似 docker-desktop 的桌面应用,可以方便的查看和管理 podman 容器。
由于 podman 相关的安装程序下载地址在 github 上,国内访问会比较慢,使得许多同学在安装问题上遇到一些障碍。本文将介绍如何在国内环境下,基于镜像代理地址在 Windows 和 macOS 以及 Linux 上安装 podman 及其桌面应用 podman-desktop。
1 Podman 安装
1.1 Windows 安装 podman
首先下载安装程序并安装:
- 下载 podman 安装程序:
https://ghfast.top/github.com/containers/podman/releases/download/v5.4.0/podman-5.4.0-setup.exe - 下载 podman-desktop 安装程序:
https://ghfast.top/github.com/podman-desktop/podman-desktop/releases/download/v1.16.1/podman-desktop-1.16.1-setup-x64.exe
该示例链接使用了当前可用的国内加速镜像地址,其中 podman 版本为 5.4.0,podman-desktop 版本为 1.16.1。请根据你的系统选择合适的版本,可前往 github release 页面获取它们的最新版本。
- podman: https://github.com/podman-desktop/podman-desktop/releases/
- podman-desktop: https://github.com/podman-desktop/podman-desktop/releases/
在 Windows 上 podman 需要基于 WSL 运行虚拟机实例。WSL 是 Windows 下的 Linux 子系统,可以方便的运行 Linux 程序。
执行如下命令启用 WSL 并安装 Linux 发行版子系统:
wsl --update
# 启用运行 WSL 并安装 Linux 的 Ubuntu 发行版
wsl --install --no-distribution
执行后需重启一下电脑。
1.2 Mac 安装 podman
1.2.1 安装 homebrew
首先确保已安装了 homebrew。基于国内镜像的一键安装参考:
# 设置二进制文件安装源。可写入到 ~/.bashrc 文件中
export HOMEBREW_INSTALL_FROM_API=1
export HOMEBREW_API_DOMAIN="https://mirrors.tuna.tsinghua.edu.cn/homebrew-bottles/api"
export HOMEBREW_BOTTLE_DOMAIN="https://mirrors.tuna.tsinghua.edu.cn/homebrew-bottles"
export HOMEBREW_BREW_GIT_REMOTE="https://mirrors.tuna.tsinghua.edu.cn/git/homebrew/brew.git"
export HOMEBREW_CORE_GIT_REMOTE="https://mirrors.tuna.tsinghua.edu.cn/git/homebrew/homebrew-core.git"

# 安装 homebrew
/bin/zsh -c "$(curl -fsSL https://gitee.com/cunkai/HomebrewCN/raw/master/Homebrew.sh)"

brew -h
1.2.2 使用 homebrew 安装 podman
在设置了国内镜像源后,基于 homebrew 安装 podman 比较简单:
# 安装 podman
brew install podman podman-compose

# 设置为 docker 别名
echo "alias docker=podman" >> ~/.bashrc
echo "alias docker-compose=podman-compose" >> ~/.bashrc
source ~/.bashrc
1.2.3 使用 homebrew 安装 podman-desktop
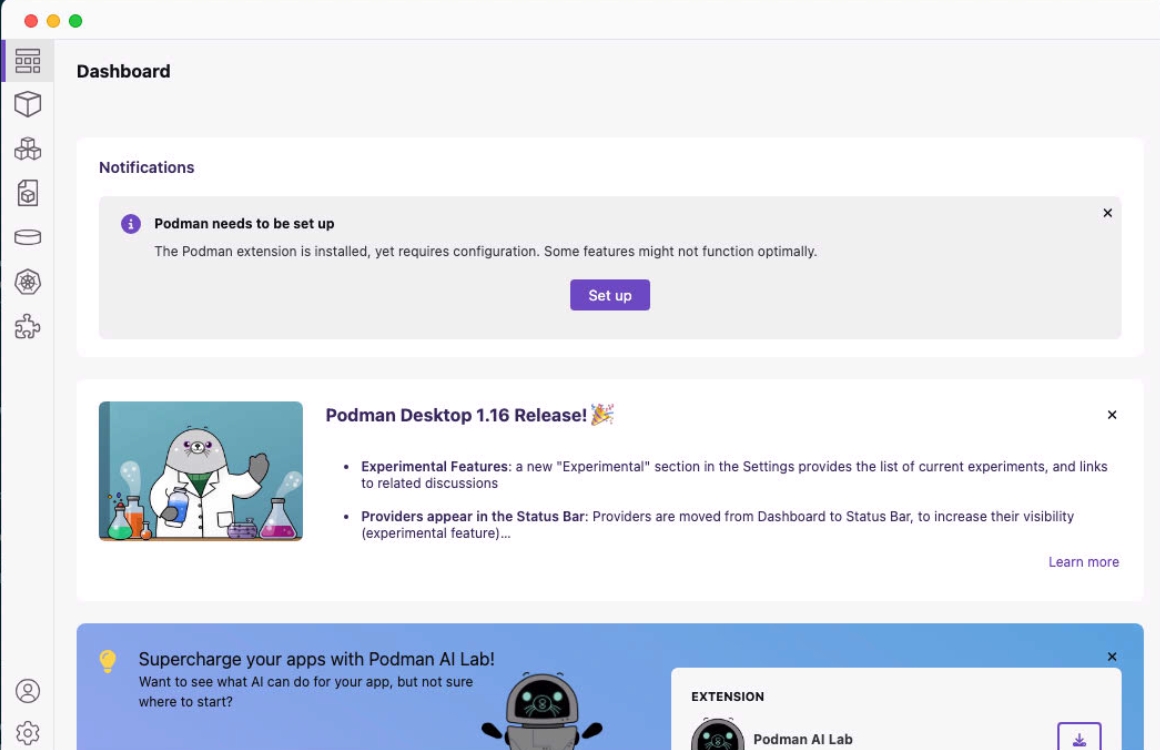
使用 podman-desktop 可以用图形界面方式方便的查看和管理 podman 容器。
brew install podman-desktop
不过执行该命令后会从 github 下载安装程序,速度较慢,可以通过代理镜像地址手动下载安装程序并安装:
- 下载 podman-desktop 安装程序:
- arm64:
https://ghfast.top/github.com/podman-desktop/podman-desktop/releases/download/v1.19.2/podman-desktop-1.19.2-arm64.dmg - x64:
https://ghfast.top/github.com/podman-desktop/podman-desktop/releases/download/v1.19.2/podman-desktop-1.19.2-x64.dmg
- arm64:
1.3 Linux CentOS 安装 podman
yum install -y podman podman-compose

# 设置为 docker 别名
echo "alias docker=podman" >> ~/.bashrc
echo "alias docker-compose=podman-compose" >> ~/.bashrc
source ~/.bashrc
podman 服务管理参考:
- 启动
systemctl start podman - 重启
systemctl restart podman - 停止
systemctl stop podman - 开机自启
systemctl enable podman - 查看状态
systemctl status podman
1.4 podman 虚拟机初始化与启动
# 初始化虚拟机。此过程会下载 VM 镜像,需要一些时间
podman machine init
# 启动虚拟机
podman machine start
# 进入虚拟机
podman machine ssh
### 2.6 podman 虚拟机配置

# 查看虚拟机信息
podman machine status
# 查看虚拟机 IP
podman machine ip
# 关闭虚拟机
podman machine stop
# 删除虚拟机
podman machine rm

#验证是否可以运行容器(拉取 hello-word 镜像并运行它,成功会输出)
podman run hello-world

# 查看安装信息
podman info
2 podman 自定义配置
在 macOS 和 Windows 下,需要首先进入虚拟机:podman machine ssh。
2.1 自定义存储位置
Podman 使用存储配置文件来管理容器和镜像的存储设置。存储配置文件位于 /etc/containers/storage.conf。
你可以通过修改该文件来自定义存储位置。例如,将存储位置更改为 /data/podman:
[storage]
driver = "overlay"
# 自定义存储位置
runroot = "/data/podman/run"
graphroot = "/data/podman/graph"

# 设置新建容器的最大存储空间
[storage.options]
size = "20G"
2.2 自定义镜像源
Podman 使用 registries.conf 文件来管理镜像源。你可以通过修改该文件来自定义镜像源。其路径为:
- 全局配置文件:
/etc/containers/registries.conf - 用户配置文件:
~/.config/containers/registries.conf
您可以编辑 registries.conf 配置文件中容器注册中心的列表。以 root 用户身份,编辑 /etc/containers/registries.conf 文件,来更改默认的系统范围的搜索设置。
执行命令 sudo vi /etc/containers/registries.conf,然后在文件中添加如下内容(以下示例代码使用了当前可用的一些代理镜像,请根据您实际测试的情况进行修改替换):
# 认情况下,podman pull 和 podman search 命令以指定顺序在 unqualified-search-registries 列表中列出的注册表中搜索容器镜像
unqualified-search-registries = ["docker.m.daocloud.io", "registry.access.redhat.com", "registry.redhat.io", "docker.io"]
# short-name-mode = "disabled"

# 设置 docker.io 前缀的 docker 地址使用其他镜像地址
[[registry]]
prefix = "docker.io"
location = "docker.1ms.run"
# location = docker.m.daocloud.io
# 当 registry.location 无法访问时,会以 mirror 顺序访问镜像源
[[registry.mirror]]
location = "hub.mirrorify.net"
insecure = true
[[registry.mirror]]
location = "dislabaiot.xyz"
insecure = true
[[registry.mirror]]
location = "doublezonline.cloud"
insecure = true

# 设置 quay.io 镜像地址 -- Redhat 镜像中心
[[registry]]
prefix = "quay.io"
location = "quay.mirrorify.net"
# location = "quay.m.daocloud.io"

# 设置 ghcr.io 镜像地址 -- github 镜像中心
[[registry]]
prefix = "ghcr.io"
location = "ghcr.mirrorify.net"
# location = "ghcr.m.daocloud.io"

# 设置 gcr.io 镜像地址 -- google 镜像中心
[[registry]]
prefix = "gcr.io"
location = "gcr.mirrorify.net"
# location = "gcr.m.daocloud.io"

# 设置 k8s.gcr.io 镜像地址
[[registry]]
prefix = "k8s.gcr.io"
location = "k8s.mirrorify.net"
# location = "k8s.m.daocloud.io"
通过如下命令可以查看镜像源配置是否生效:
podman info
podman info -f json | jq '.registries["search"]'
此外,也可以创建 $HOME/.config/containers/registries.conf 文件来覆盖系统范围的设置。
扩展参考:
- https://www.redhat.com/en/blog/manage-container-registries
- https://docs.redhat.com/zh-cn/documentation/red_hat_enterprise_linux/9/html/building_running_and_managing_containers
3 podman 常用命令参考
- 拉取镜像
podman pull nginx - 查看镜像
podman images - 构建镜像(假设当前目录下存在 Dockerfile 文件):
podman build -t <imagename> . - 创建容器
podman run -d --name nginx -p 80:80 nginx - 查看容器
podman ps -a - 查看容器详情
podman inspect mycontainer - 进入容器
podman exec -it nginx /bin/bash - 停止容器
podman stop nginx - 启动已停止的容器
podman start nginx - 删除容器
podman rm nginx - 删除镜像
podman rmi nginx - 查看容器日志
podman logs nginx
podman-compose 是一个兼容 docker-compose 的工具,它们的用法基本一致。例如:
- 启动:
podman-compose up -d - 停止:
podman-compose down
通过前述的别名设置后,我们也可以将以上命令中的 podman 替换为 docker,达到和 docker 类似的使用体验。
4 相关参考
- https://podman.io
- https://podman.org.cn/docs/installation
- https://github.com/containers/podman
- https://github.com/podman-desktop/podman-desktop
- https://docs.redhat.com/zh-cn/documentation/red_hat_enterprise_linux/9/html/building_running_and_managing_containers


[…] 替代 docker 与 docker-desktop:国内环境下 podman 的安装与使用 […]
[…] 替代 docker 与 docker-desktop:国内环境下 podman 的安装与使用 […]